Online presence is an essential part of personal branding. One of the best ways to establish your online presence is through a personal website. This article will help you understand how to create a basic, functioning website as well as the resources needed to create a beautiful one. The three basic steps you need for a working website are purchasing a domain name, buying a web hosting service, and creating web pages.
Step #1: Purchase a Domain Name
Purchasing an easy-to-remember domain name is very important, as this is the way people will access your website. For example, you type “yahoo.com” in a browser to visit their website. Once you own a particular domain name, no one else can have the same name as yours for the period of your purchase—and it can be renewed.
I purchased my domain name using domain.com and found it very affordable, but there are many other great options available.

Step #2: Buying a Web Hosting Service
Web hosting services are where all your website files are stored and are what connects your website to the internet. A good web hosting service can ensure your website never goes down, loads quickly, and has timely customer support. I personally used the “Hatchling Plan” from HostGator and have been very satisfied with their services, but there are also many other great options available.
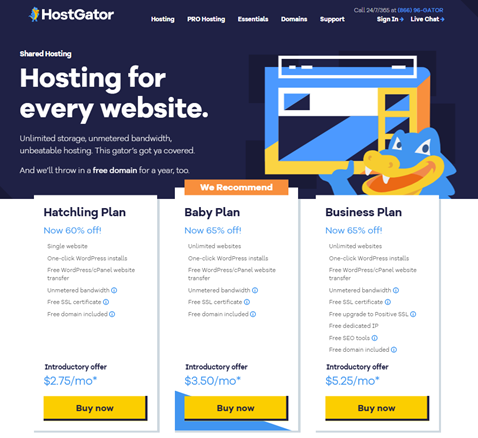
After you purchase a domain name and a web hosting service, you need to update your domain name settings so that it connects with your hosting service provider. Below is a short YouTube video that explains how to connect a domain to HostGator Hosting.
https://www.youtube.com/watch?v=i2KkJh05yggOnce you connect the two, visitors can just enter your domain name on a browser and visit your website. Behind the scenes, what is happening is that when you enter a domain name on a browser, the Domain Name System (DNS) translates that domain name into the Internet Protocol (IP) address of your web hosting company’s server, where all your website files are stored. So, when you enter the domain name, your browser is making an HTTP request to that IP address for the web pages. The server at that IP address returns the requested web pages to be rendered on the browser.
Step #3: Creating Web Pages
For a personal website, I encourage you to code your own even if you are not a programmer because it’s not as hard as you might think. With a few simple tips, you can easily get started.
Usually, your website pages will be made of HyperText Markup Language (HTML), Cascading Style Sheets (CSS), and JavaScript (JS) files. In general, your HTML files define the content of your web pages, your CSS files define the style of your web pages, and your JS files add an interactive experience to your website.
To start with, you need a code editor. I personally used Visual Studio Code, and which you can download through the link below:
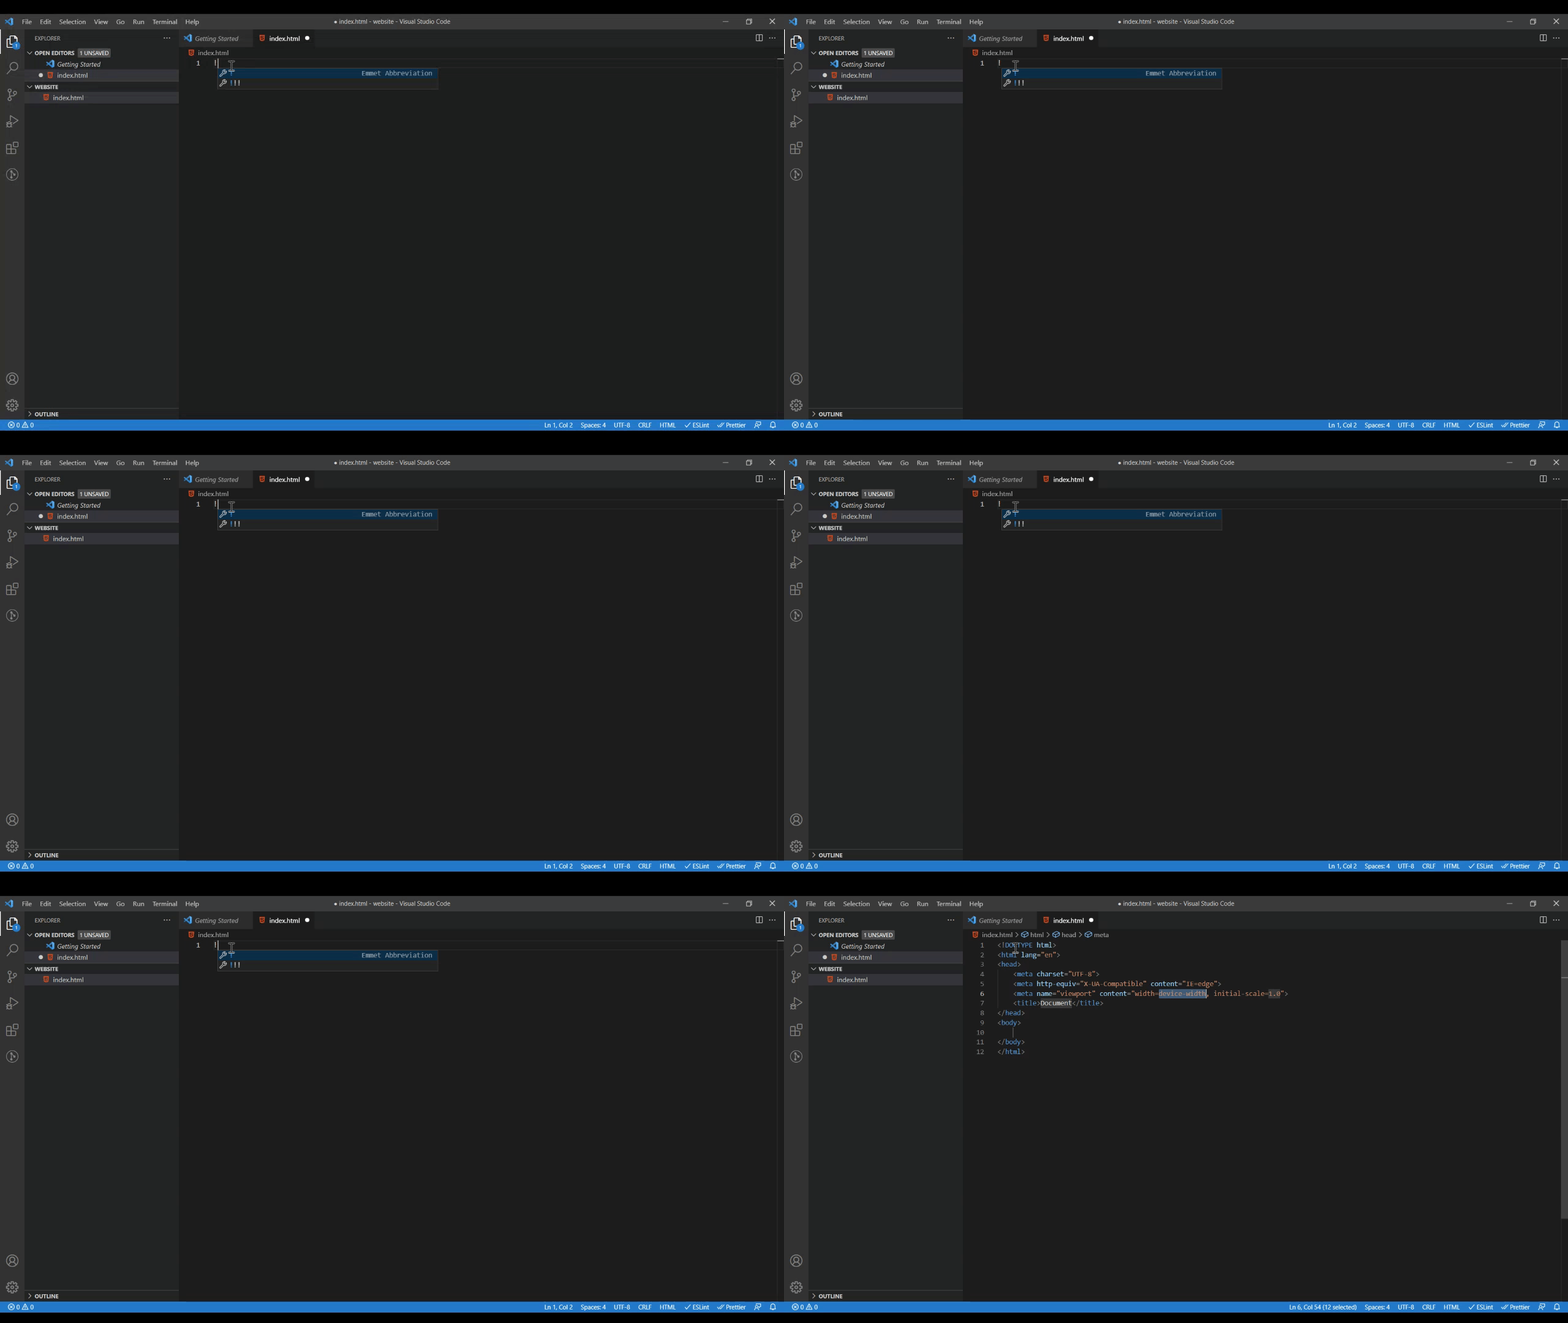
https://code.visualstudio.com/DownloadAfter installing Visual Studio Code, open it and create an index.html file as your homepage. Then enter the “! + Tab” shortcut key to create a starting template in your HTML file as shown below:
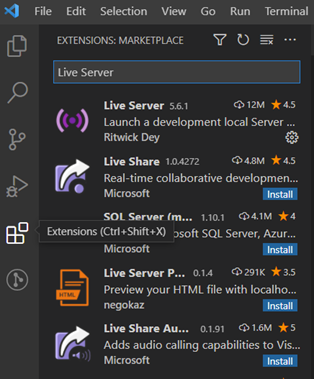
The next step is to add some “Extensions” to your code editor. The “Extensions” button can be found on your left side menu bar. Then search for “Live Server” and install it. This will allow you to view your web pages in real-time.
To make it easy to create a simple, responsive website, we can use a “Materialize CSS” framework, which can be used to make your coding much easier when you are a beginner. To start off, we can copy the Content Delivery Network (CDN), which can be found in the link below, and then paste it into your index.html.
https://materializecss.com/getting-started.html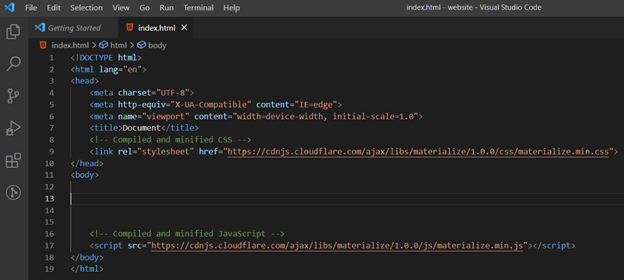
On the “Materialize CSS” website, we can click “Components” on the left side menu bar. Under “Components,” we can navigate to “Navbar” and “Cards,” and under each, there will be several template codes. You can copy them inside your “
” tag of the index.html file. Mostly, your code and content will be inside the “” tag as everything inside the “” tag will be displayed on the website, while everything in the “” tag is what will not be displayed on the website; however, this depends on the particular case.After that, find your index.html file on your left side and then right-click. You will see a drop-down menu. Click “Open with Live Server.”
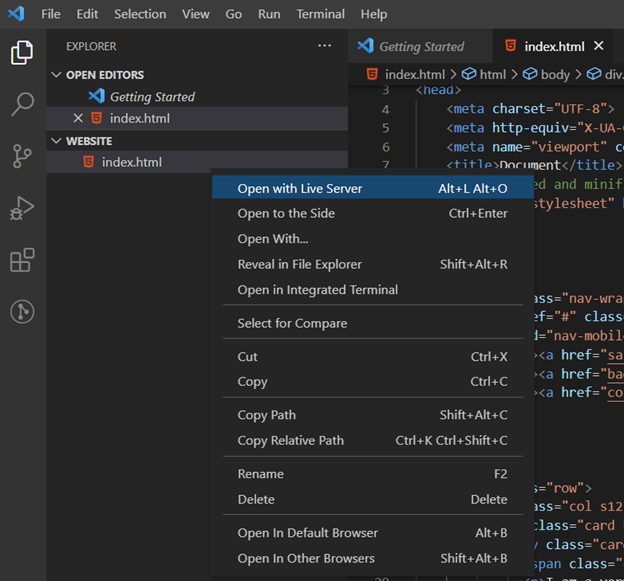
Your browser will be opened automatically. There, you can see your coding progress in real-time.

The above information is only to help you get started. Once you know where to start, you can then continue with w3schools to learn HTML, CSS, and JavaScript. I like it because it’s easy to follow and understand. Some great design and coding examples can be found on codepen. For some nice font styles, you can visit Google Fonts. You can also get some nice icons from Font Awesome. If you just want to practice, I recommend using Glitch as a playground. Once you have a website running on the Internet, you can add Google Analytics to your website in order to better understand your visitors.
It takes some time to make a beautiful website, but we can start building a simple one and then gradually add additional features. These, however, are the basic tools to get you started. To further your knowledge, you can just start coding and do research along the way.